• ABOUT
  • PRIVACY POLICY
  • TERMS AND CONDITIONS
  • CONTACT US

Handyman Sydney

Home Improvement, Home Repair And Home Renovation

Best Ways to Keep Your Carpets Clean

February 11, 2014 by Billy Soler

Best Ways to Keep Your Carpets Clean
handyman sydney eastern suburbs
Photo: sydneywidecarpetcleaning.com.au

The best way to keep carpet looking good is with regular care and attention. Don’t allow the carpet to get too dirty before you take steps to freshen it up as some discolouration can become permanent. There are two stages to good carpet care regular maintenance and emergency treatment for spills and stains.

New carpet tends to shed fluff just after it has been laid. Vacuum clean initially then pick up fluff with a carpet sweeper or hand brush. After a week or two the carpet will have settled and you can vacuum clean it regularly.

All your carpets will benefit from a quick daily once-over with the carpet sweeper. The exercise is great for the operator and saves time later on weekly vacuum. Once or twice a week, vacuum cleans the carpet thoroughly. Make several passes over each section to remove embedded dirt and grit as well as surface dust.

Shampoo carpets at least once a year. You can buy a good carpet shampoo or rent an electric one. The main objective is to spread the foam shampoo evenly, working it well into the carpet without soaking it through. There are several very good carpet shampoos on the market, all used in a similar way.

1. Vacuum clean the carpet to remove all surface dirt. Some shampoos also suggest you pre-clean any really heavily soiled spots before doing the larger area.

2. Remove furniture from the room or place lunch wrap or tinfoil under the legs to stop them from getting wet.

3. Read the directions on the product fully. Apply the foam either from the spray can or with a shampoo as directed.

4. Allow remaining on the carpet for the time specified then vacuum away. This will remove all the hard-to-dislodge dirt along with the dried foam residue.

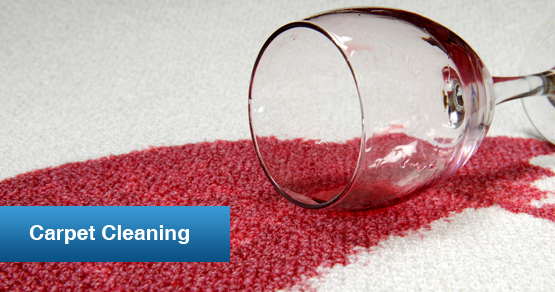
Most shampoos also recommend you test your carpet for colour fastness by using a small amount of the shampoo on an inconspicuous area. Any carpet product you use for the first time should be checked in this way. Always attend to spills as soon as they happen. If the spill is liquid, blot up as much as you can before it soaks into the carpet. Use white paper towels or tissues. Apply spot remover to the carpet and leave it on for a few minutes then blot or sponge the stain working from the edge to the centre of the area. Dry the affected area as fast as practicable, say by directing air from a hand held hair dryer, fan or small radiator at the spot. Lightly brush the pile when dry. Alternatively, use a dry carpet cleaner, a powdery substance that is sprinkled on the stain and sponged in then vacuum out.

Treating common stains

• Wines and spirits are removed by ‘dry cleaning”. Sponge the stain with dry cleaning fluid, refolding the cloth and moistening it with more fluid until the stain is removed.

• Most of the “sweet stain’s” such as fruit, soft drink, chocolate and sugar can be treated with a solution of 1 tablespoon of mild detergent in 1 cup of lukewarm water. Sponge onto the area and blot with a clean damp sponge or damp cloth. Repeat until stain is gone. 1/4 cup of white vinegar mixed with 3/4 cup of lukewarm water is sometimes effective on these stains. Sponge onto the mark, leave 2-3 minutes then sponge with clean water. Repeat as necessary then dry thoroughly.

• Oils such as fat, butter and lipstick should have the excess scraped off then the residue treated with a cloth soaked in cleaning fluid, blotting from the edges to the centre of the stain. After applying cleaning fluid, treat with carpet shampoo, foamed in water and sponged onto the area. Wipe off the foam and blot, and then sponge with clean water. Repeat as required. Do not soak the carpet.

• Chewing gum and candle wax can be rubbed with an ice cube to make them go hard. Scrape off with the back of a knife and sponge with cleaning fluid.

Remember that what works well on one kind of fibre may harm another so test any new cleaner or treatment on an inconspicuous part of the carpet. For impossible to remove stains, call in a professional cleaner and tell him what caused the stain and which treatments you have tried to get rid of it.

You may also be interested in :

  • home renovation

    Start Your Own Compost Bin

  • Necessary Licences And Insurances for Concrete Services Near Me

    Necessary Licences And Insurances for Concrete Services Near Me

  • Advance Through Innovation

    Advance Through Innovation

Filed Under: Handyman Sydney Tagged With: Carpets Clean

Fixing A Dripping Tap

February 11, 2014 by Billy Soler

Fixing A Dripping Tap
Photo: howtoaustralia.com.au

Few things can be more irritating than the drip-drip-drip of a leaking tap, usually in the middle of the night. A constant drip also wastes many litres of water and will stain a sink or bath after a time. All you need to fix the drip is a screwdriver and an adjustable wrench, plus a replacement washer. For most baths and mixer taps you need 118mm washers and 12mm fits most sink and basin taps. The most common household taps are classified under bib-cock, pillar-cock, recess or flange stop, hose-cock and stopcock fittings. Basic operation is similar in all types. First shut off the water either at the tap on the rising main for mains-fed taps or at the appropriate stop tap. If your water system has no stop taps turn the water off at the main and open all the cold taps to drain the water from the pipes. Make sure the heating is turned off before you drain water from a water heater.

Once you have turned off the water supply, open the tap fully. If there is a cap, screw it out or if it is just clipped in, prize it out with a thin screwdriver. The tap may have a shield or cover which should be removed. If using a wrench, wrap a piece of rag or tape around the part of the tap being unscrewed to avoid damaging it. This applies to a bib-cock assembly as in Diagram (A), where the barrel assembly screws out in one piece.

Some taps have a combined handle and cover with a nut holding the cover to the spindle. This has to be undone before you can lift off the cover. If the tap has no nut, open tap fully and continue unscrewing to release the cover. Once you have unscrewed the top portion (which contains the handle spindle), you will see a hexagonal shaped head on which the washer sits. The washer usually drops out into the tap body as the top portion is unscrewed. This can then be replaced with a new washer of the same size. In many taps, the washer is secured to the jumper by a nut or screw. Remove the nut or screw and replace the washer. The washer can be of leather, fibre, or plastic, the most common being neoprene. You can also buy a washer that is fixed to the jumper permanently. This is called a jumper valve. If you are fitting a new washer only and not a complete washer assembly, the burring on the thread of the washer assembly must be carefully filed off (The burring is there to prevent accidental unscrewing). Once the new washer is in place on the old washer assembly or jumper body, replace the retaining nut firmly but do not over tighten it. Then reassemble the tap but before tightening everything well, smear the thread with Vaseline or petroleum jelly. Tighten with hand pressure only. The water supply can then be turned back on and the repaired tap allowed to run gently for a while to remove any air trapped in the water pipes.

Reseating a tap Diagram (B).

If the tap continues to drip even after you replace the washer, the seating is probably worn. A plumber can regrind the washer seating for you or you can purchase a tap reseating tool to reface the seat yourself. This tool has cutting teeth. You insert the tool in the tap and install the packing nut over it then turn the handle to screw the tool down against the tap seat. The cutting teeth then grind the seat smooth. Cheek that it is smooth and shiny before reassembling the tap. There is also available a special seating washer that simply fits into the original seat and gives a smooth seat for the washer to sit on See Diagram (A).

Replacing an “O-Ring” or a jumper valve.

If the water leaks from around the handle of the tap, you’ll probably find that the “O-Ring” needs replacing Just follow the steps in Diagram (C), from 1-8, and you’ll find it a rather simple process Remember to wrap the tap in rag or tape to protect the chrome if you are using a wrench.

However, some older style taps have a “gland nut” positioned just below the spindle (see Diagram (C) step 6), and this could also be the cause of the “handle leak”. Try tightening the nut about a quarter turn with an adjustable wrench.

Put the tap back together and turn it on. If it still leaks you’ll have to replace the “0-Ring”.

Sometimes the tap will leak from the spout. This is probably caused by a worn washer commonly called a jumper valve (see Diagram (C) step 7). It is easily replaced, just follow the steps to remove the barrel assembly and the washer will simply drop out. Replace it and reassemble the tap.

You may also be interested in :

  • home plumbing system

    What is Plumbing

  • Photo: goodgearguide.com.au

    How to install a doorbell

  • handyman licence

    Expert Advice on Installing And Maintaining Gutters

Filed Under: Handyman Sydney, Plumbing

Fix a Leaking Pipe

February 11, 2014 by Billy Soler

Fix a Leaking Pipe
Photo: sjaplumbing.com.au

Leaks in drain pipes and water supply pipes can be stopped up with epoxy glue. If possible, shut of the water to that section of the pipe either at the stop, or at the mains. Then clean around the leak and allow it to dry before applying the epoxy. Thorough drying is essential to get a good repair. If using a 2-part epoxy, mix it very thoroughly and paste on to a section of absorbent material such as cotton. Bandage the leak with this glue-soaked fabric. If using ordinary epoxy, wrap several layers of cloth soaked in plenty of glue, around the pipe. If water is still in the pipe you will have to wrap it securely to stop the leak until the epoxy has a chance to set. Same leaks may need to be reinforced with a C-clamp while they set. Bandage as described, then wrap a piece of rubber or other non-porous material around the repair and fix the clamp to the rubber. (This stops the clamp becoming glued to the repair.)

If you have no epoxy handy, a temporary measure is to wrap the crack or hole with several layers of rubber (even cut from a child’s balloon will do) and clamp tightly until a more permanent repair can be made. Use a block of timber to hold the rubber in place. Splitting a length of rubber house and clamping it in place with hose clamps, also helps. A small leak can be stopped for the time by bandaging the effected part with waterproof tape. Ensure that the tape covers several centimeters each side of the hole or crack.

Epoxy repairs cannot be used in joints, where leaks frequently occur. Sometimes the threads on galvanized pipe joints can work loose, allowing water to seep out. Wrap some Teflon tape around the treads of the pipe. This will tighten up the joint and may stop the leak.

Start to screw the pipes together by hand to ensure that the joint goes together freely and not cross-threaded. Use a pair of stilsons to tighten up the joint, one turned in each direction. If this doesn’t stop the leak, there is a special pipe sealing compound witch you can buy to reseal this joint. The compound helps form a water-tight seal and stops the fittings “freezing” together so they can be removed later on if required. A leaking joint should be gently loosened with a pipe wrench or stillsons, the compound applied and the joint re tightened. Also check any connections each side of the repair, as you work may have loosened other joints. A compression fitting may only need a slight tightening to stop a leak. However, if copper tubing leaks at a joint, the joint usually has to be re-soldered.
This involves shutting off the water supply, draining the pipe completely (this is very important as an explosion can occur if the steam is generated in the pipes), and cleaning away the old solder before applying new solder. Steel wool is good material to use, to insure the pipes are thoroughly clean.  Always apply a flux to the pipe to ensure a good bound between solder and pipe. apply heat to the joint until the solder melts, ensuring the solder runs freely around the joint.  Always fit the joint before heat is applied. Unless you are skilled at soldering, this probably best left to a plumber.

You may also be interested in :

  • Photo: howtoaustralia.com.au

    Fixing A Dripping Tap

  • home plumbing system

    What is Plumbing

Filed Under: Plumbing Tagged With: leaking pipe

How to install a doorbell

February 10, 2014 by Billy Soler

How to install a doorbell
Photo: goodgearguide.com.au

Although there are doorbells, which are air operated, called manual doorbells, most are now operated by low voltage supplied from batteries or a transformer. They comprise a bell or chime unit located on an inside wall, usually near the door, a push-button outside on the door frame at about an adult’s chest-height, and twin bell wire connecting the two. Some doorbells come complete with everything you need to install them, others require you to supply the wiring, push button and fixings as extras. The choice of styles is very wide these days. Doorbells come in multi facet designs, with textured metal surfaces or ceramic tile inserts, or with long anodized metal chime tubes. Some chimes have a signal for one door only, others incorporate two different signals -one for the front, and one for another door.


How To install a Doorbell

1. Decide on the best location for the chime or bell unit. Chimes sound best when fixed in the hallway about 2m from the floor. Fix tube types away from droughts or places where people will keep brushing against them. Do not install the bell unit over radiant heat sources such as stove or radiator, or on the door itself where it will be subjected to vibration.

2 Remove the back from the bell or chime unit. It will usually pride apart with your fingers.

3. Measure out a length of twin bell wire long enough to travel between bell unit and push button. Leave some slack so it can be tucked away behind moldings or door-frame.

4. Attach the two ends of the wire to terminals in the bell unit and on the push button as directed by the manufacturer.

5. Mount both units in desired positions. Fix wiring out of sight with wiring nails or staples hammered into place every few centimeters.

6. Fit the number and size of batteries specified. Some doorbells can be fitted with an appropriate transformer if mains operation is desired. This reduces the mains power to a low voltage and makes the system safe. On no account should the doorbell be connected directly to the mains.

Material you’ll need:

  • Doorbell and instructions
  • Twin bell wire
  • Warring nails or staplers
  • Push button
  • Batteries or transformer
  • Antistatic cloth

Tools you’ll need:

  • Penknife
  • Screwdriver
  • Hammer

You may also be interested in :

  • Photo: howtoaustralia.com.au

    Fixing A Dripping Tap

  • How To Become A Licensed Electrician

    How To Become A Licensed Electrician

  • How Much Does An Electrician Cost In Sutherland Shire

    How Much Does An Electrician Cost In Sutherland Shire

Filed Under: Electrical, Handyman Sydney

What is Plumbing

February 10, 2014 by Billy Soler

What is Plumbing
home plumbing system
Photo: preferredplumber.com

Although the plumbing in your home may seem complicated, it really comes down to two simple systems: one for bringing water to your home and another to draw
away waste and used water.

In coming water supply. see photo.The most common kinds of pipes used in homes are copper and galvanized iron. Plastic piping is now being used more and more as technology gets over problems such as high water temperatures. At present, copper is probably the most desirable material for piping because it is non-rust and does not build up scale which can clog galvanized piping. Rust, which can occur in galvanized pipes, not only discolors and “tastes” water, but can stain fixtures and clothing washed in it.

Because the water reaching your home is under pressure, you have only to turn on a tap and the pressure forces the water out. This pressure also ensures that the water can travel wherever it is needed, upstairs, around corners or whatever. All the water comes to your home as cold water. lt is fed through pipes to all cold water outlets and one part of the cold water system carries water to the water heater. From here, the hot water is carried to the required fixtures such as shower and kitchen sink.

Water heaters

There are several different water heating systems you can have installed. The simplest is the instantaneous type which supplies hot water to one or more outlets. Turning on the tap automatically switches on the water heater, whether it is gas or electric operated. Another heater is the storage type which has a tank or cylinder in which heated water is stored until drawn off, when cold water comes into the tank to replace it. Storage heaters contain their own heating element and the tank is usually sited near the main draw-off point, such as the kitchen. Storage heaters come in different forms. It may heat and store water during periods of low fuel demand (called off-peak). Ask about various kinds of water heating at your supplier.

You may also be interested in :

  • handyman licence

    Expert Advice on Installing And Maintaining Gutters

  • Indicators on Getting Your Employees Ready For Their Heavy Vehicle Licence You Need To Know

    Indicators on Getting Your Employees Ready For Their Heavy Vehicle Licence You Need To Know

  • best handyman sydney

    You Can Create An Artificial Brick Wall...yes you can

Filed Under: Handyman Sydney, Plumbing Tagged With: home plumbing

  • « Previous Page
  • 1
  • …
  • 9
  • 10
  • 11
  • 12
  • 13
  • Next Page »

Our Preferred Partners For Drafting Services in Sydney

House Plan Design & Drafting Services
24 Pines Parade, Gymea NSW 2227
Facebook
Google+

For Decking Builders in Sydney, We Use The Pergolas Sydney Authority Services

Sydney Timber Decking Specialists
7/40 The Grand Parade
Brighton Le Sands , NSW 2216
Phone: (02) 8080 4340
Facebook
Google+ MAP

Our Partners For Driving School in Campbelltown

Sydney South Driving School
Phone 0409129275
10 Salerno Pl, Blairmount , NSW 2559
Facebook
Youtube
Liverpool Driving School
Unit 22, 32 Castlereagh St, Liverpool, NSW, 2170
Phone: 0282779091

Copyright © 2025 · Lifestyle Pro Theme on Genesis Framework · WordPress · Log in